As those of you who read my blog on a regular basis will know, I love to take part in these challenges and always intend to create the project and get it posted before 10 am UK time on the day the challenge is issued.
Well, yet again I have failed to meet that self imposed time frame, so here I am at about noon, writing this blog post. I am a little ashamed that it took me so long to get this posted, as it is not the most complicated project, and the challenge was to CASE the Designer, who this time is the wonderful Kylie Bertucci from Australia.
Anyway, here is my entry. I have lifted the colours and the layout, I have also used the dies that go with the stamps that Kylie used, so it is pretty close to the original, but just with a bit of a twist.
I hope you like it. If you need any of the supplies, please pop over to my online store just my clicking the link on the right of this blog, or on the products listed below.
My mojo is beginning to make a reappearance, for which I am very grateful. Because of that, I thought I would make a 'Thank You' card. Today the colour scheme came from my trick of writing down a number to represent an ink pad on my Colour Caddy. Today was Subtle 7, Bright 3, Regal 4 and Neutral 6. For those of you who are new here, the trick with this is that I do not have a set location for my ink pads, other than within the colour family, so I have no idea which colours I will end up with. The only exception for this is the Neutrals, which are in a set order, with Basic Black and Basic Grey at the top, then from palest to darkest from there.
Today's selection were Wisteria Wonder, Tangerine Tango, Elegant Eggplant and Soft Suede, and I think it works. This time I used Watercolour paper for a wash of colour, having heat embossed 'Thank You' from the Sale-a-Bration 'So Very Much' stamp set, using the clear embossing powder.
For the video version, well at the time of writing this, I have no idea what will happen as I will be doing that 'as live'. All I do know is that I will be using the French version of the 'So Very Much' stamp set (Infiniment et plus - Item number 144322) and Whisper White embossing powder so there is a more obvious difference between the wash and the words. But other than that ...... well you will have to watch the video.
Today's project is a little different as it is a 4 x 4" card, and uses vellum to produce a water-coloured effect, but by painting from the back. I have used the Avant Garden Stamp Set from the Sale-a-Bration catalogue, inked with Memento Tuxedo Black and then left to make sure it is really, really dry before flipping it over and adding some colour with Stampin' Write Markers, I moved the colour around with the smaller Aqua Painter until I was happy with the effect.
Once the vellum piece was dry I added some Fast Fuse to the top and bottom of the whisper white and then used this to wrap the vellum round the card. This means that there is no sign of adhesive through the Vellum, which can be a problem with this.
A piece of the Sale-a-Bration Metallic Ribbon, a few dimensionals to attach it to the card base, and it is done.
I love the effect that this gives, so soft and subtle.
I hope you enjoyed this and will give it a go yourselves. If you need any of the supplies, please hop over to my online store and fill that bag with lots of pretty things.
Dimensions:
Card
base - 4 x 8" (10 x 20 cm) folded in half to make a square card
When I lack inspiration there are a few things I do to get the Mojo back. One is to spin my colour caddy and just pull a few ink pads, the other is to pull any stamp set off the shelf, and finally to have a look at the Catalogue. This is full of inspiration, which may be why the front cover has 'Find your Inspiration' emblazoned' across the front.
Today was one of the days when I have had to do all three of the above, although I almost gave up when I looked at the colours I had pulled. I mean, Rose Red, Pool Party ad Early Espresso are not a colour combination I would ever have come up with on my own. But actually, I think it works, although the Rose Red does turn very neon when you water colour on Shimmery Cardstock, but then the foil of that almost black Early Espresso and the cool blue of Pool Party do ground this pop of colour well.
So what do you do when you loose your mojo? I would love to hear your solutions, just leave me a comment below. I always reply to any comment, so go on, share your ideas.
Those of you who read my blog on a regular basis, and particularly those who watch my YouTube Videos, will know that I have recently attended a Team Event. There were 65 of us there, which was amazing. We all had a fantastic day swapping ideas and projects, attending classes, making new projects and generally having a wonderful day.
In the video below, you will see the swaps that I was involved with and the projects we made on the day, as well as the fantastic gift that I received for helping out with the provision of supplies; and my Team Leader was right, it is a lovely set, one that I had not expected to like.
In the video I forgot to show you any pictures of the Sale-A-Bration Tin I decorated as part of one of the challenges we could enter, but I have included some pictures here.
I hope you enjoy the video and the pictures of my swaps, the projects we made on the day and my gift.
My Gift for providing some supplies on the day - Sooo Cute!
The swaps I made
My decorated Sale-a-Bration Tin
This highlights the Sale-a-Bration Glimmer Papers that have just been added.
The projects we made on the day
These types of event are always such fun, and one of the many, many reasons why becoming a member of this family is so fantastic.
I think this is a stamp set that people are passing by in the Spring/Summer Catalogue because they are not sure what to do with it, but I think it is one of the most versatile sets this season. There are 27, yes 27, images, including five sets of words. It is perfect for scrapbooking, because of the size of the images and the words that are used, but it is also perfect for cards. The two I have made here are about as far apart as you can get, the original being perfect for the man in your life, and the one I made on video being ideal for the arrival of a little on (or perhaps the mother of a little one, or is that just my slightly odd mind!)
The original had some heat embossing, but that was more because I used a single colour of ink and wanted the words to stand out a bit, so the 'live' project doesn't. I love that our inks are so good that you can get generational stamping out of them, giving you extra tones of each of the colour used. A little hint of something at the top of the card, just to give a bit of balance, and we are done. How easy is that.
I highly recommend taking a look at this set, there really are lots of things you can do with it.
Everyone has been telling me I should get the Gorgeous Grunge Stamp Set, but I have not been able to get my head around it, but as we were going to be using it at our Team Meeting at the weekend, I thought I would take the plunge and buy it. Well, I LOVE IT!! I am just kicking myself that I waited so long to get it. It is fantastic.
The cards I made are really not complicated, but they do show off the main elements so well. The Stamped images are the perfect background for the new FREE bling of the Sale-a-Bration Glimmer Paper Stack available FROM TODAY, along with two new stamp sets. The Glimmer Paper has four 6 x 6 sheets of Bermuda Bay, Sweet Sugar Plum and Mint Macaron; because they are 6x6 they are perfect to use in the BigShot, so I have used two of the phrases from the Sunshine Wishes Die set. I have used the colour of the die cut as the background to each of the cards, and also used the same colour as the predominant colour for the stamping, using up to three generations of ink to get the different tones.
A bit of extra bling with the sequin trim and a few of the sequins dotted around the card, a dark mat to frame the stamping, and we are done. Another quick project, but lots going on in it.
The only problem I have with this is that the Glimmer Paper is on a very limited run, so will only be around for a few more weeks. If you want it, you MUST get your qualifying order in (any order of £45 - excluding P&P), remember you get one FREE item for each £45 in a single order.
I love waking up on a Monday knowing that I have another Global Design Project to work on. Whether I meet my self imposed deadline of completing the project, which has to be new, so no rummaging through my samples box to find an existing project that fits the week's theme!!
I aim to read the details of the challenge, create it and have it posted by 10.00 am UK time. This week is going to be tight as I have an appointment at 9.00 and I am writing this at 9.35 .... will I make it? I know what I want to do, but that is not the same as doing it, photographing it and getting it posted here.
This week's Challenge is:
Let's see how we go.
Well that is a 'fail' then, I have over run by about 40 mins, but still not too far off schedule. Here is my entry using Papillon Potpourri and every ink pad I could lay my hands on in the yellow/orange/red spectrum. Layered on So Saffron with a Rose Red card base, so almost the two extremes of the colours I chose.
I hope you like it.
Remember tomorrow sees the launch of three new products to the Sale-a-Bration range, including my personal favourite, a stack of 6x6 Glimmer Paper, which has for sheets each of Mint Macaron, Sweet Sugarplum and Bermuda Bay - Fabulous.
The absolute best offer during Sale-a-Bration, and there are quite a few to chose from, has to be the enhanced Starter Kit that until the end of March includes two additional stamp sets of your choice, on top of the usual £130 of product (also of your choice) all for JUST £99 including P&P - come on, you know you want to.
I seem to be in the mood for simple cards at the moment, probably because I have spent a few weeks working on some more complex and involved projects and want to have a look at some examples that are a bit cleaner and uncluttered. It may also be because I am starting a new round of face to face classes this week, with a real mix of ladies, some who have some previous experience, and some who are real beginners.
Today's project is about as simple as it gets with one large image stamped off the top mat a few times, a small sentiment and then a smaller image stamped inside the card. A bit of washi tape, a mat of Designer Series Paper and we are done; you really can't get much simpler than that, but I still love the result. How about you? Do you prefer the more involved projects, or are you happier with the cleaner lines of these types of card?
The bonus with these two cards is that they would both work for men, young or old, which is always good, as they really are a challenge sometimes.
Later this week I will be heading off for three days of scrapbooking, so have started to think about what supplies I should be taking with me. My eye was caught by a box of Project Life cards that I had almost forgotten about, so I started to have a look through them and thought they would be perfect for some really quick cards, and they were!! I think this video is one of the shortest I have ever done, which I am sure you are all grateful for.
Not all the cards in the set would work well for these type of project, but I would certainly encourage you to have a look at them as card supplies as well as supplies for memory keeping. There are so many lovely sets to choose from, and the Stampin' Up! sets don't have rounded corners, so really are ideal for cards.
Please remember to make the most of the Sale-a-Bration offers while they are still available. We are about halfway through now, so you really should be looking at getting your order. As I write this, the fabulous Watercolour Pencils are listed as being LOW IN STOCK, so if you want these, you really shoudl be getting your order in; extras are being made as we speak, but are not due to arrive until the end of APRIL!!!! How do I know all this? Being part of the Demonstrator family, we are given regular updates on stock levels, as well weekly emails with ideas of how to use them and our regular magazine crammed with great ideas and tutorials. Just another reason why being a member is so great.
Dimensions:
Card
base - A5 folded in half to make an A6 base
Mat
of Project Life Card cut to 5-5/8 x 3-7/8" (14.25 x 9.75 cm)
Well, Valentine's day is now behind us, and I hope you all received lots of Happy Mail (or just the one you really, really wanted!!). But now what do we do with all those lovey dovey supplies? Well I am going to see just how many ideas I can come up with using just the Sealed with Love stamps, Love Notes Framelits and Sending Love Designer Series Paper. Over the next few weeks, once a week, I will post an idea using these supplies as the focal point for the project. I am hoping that this will help you either get the most out of the sets that you are now wondering why you bothered getting for just one card (I do get that in the USA you send Valentine cards to pretty much the whole world and his mother, but in the UK, it is still uncommon to send more than one, or maybe two). I may even tempt you into getting the sets just so you can replicate these awesome projects!! You never know.
Today's project is probably the easiest concept, but a good jumping off point none the less. One of the challenges I have planned for my Team (Team watch out for this one!) is to stack up all your ink pads in the colour families and then chose five colours and a neutral at random. The way I do this is to put mine in my Colour Caddy in their families, with the In Colours randomly placed. I then write down five colours and a Neutral: Regal 10 and 6, Neutral 2, Brights 5 and 12 and Subtles 7. I then count down the colour families and pull that ink pad, if a column doesn't have the full set, I just go back to the top and continue counting. As I have no strict order for my ink pads, I have no idea which colours will come out. Today is Rose Red, Crushed Curry, Basic Grey, Pumpkin Pie, Wisteria Wonder and Calypso Coral (which for some reason was in with the Brights!!)
I just played with the order of these until I was happy, and then stamped using the same paint brush stamp in a little diagonal. Sentiment at the bottom, an Enamel Shape in each of the colours next to the sentiment, mat on Pumpkin Pie (only because I have lots left over from Halloween) and we are done.
And do you know what? I love it! I would never have chosen those colours to put together, but they kind of work.
Why don't you have a go at this challenge and see what you come up with (use any stamp set you have). I would love to see your projects, so why not post them on my Facebook Page?
Now what shall I come up with using these supplies for next week?? Come back to find out.
The idea for today's project came from a request form one of the other members of my Team. She needed some sheets of Designer Series Paper from the A Little Foxy Designer Series Paper Stack. I have used a lot of this stack as it was the basis for the swaps I made for the Stampin' Up! Convention, Onstage, last November, but as our Team is proud of how we support each other, I had a look through what was left and was delighted to find that I had four of the specific pattern she was after; those are now in my bag ready to take to our Team meeting this weekend. But, looking through the papers reminded me of how very cute they are and it sparked an idea.
The weather over the past few days has been very odd. Some have had quite a lot of snow, some rain and some just generally dull. As the papers in the stack have both rain and snow patterns, I thought I would make a North and South pair of cards. The only changes I made between the two cards were the patterns I chose from the stack, everything else is exactly the same, but I think they have a different feel to them, the snow effect card definitely being colder.
I hope you have enjoyed looking at these, I really had forgotten just how cute this Suite was, and so easy to put together with the Fox Builder Punch.
Don't forget that Sale-a-Bration continues until the end of March and that for every £45 you spend in one order, you can choose a FREE item from the Sale-a-Bration Catalogue. Take a look at all the other Sale-a-Bration offers.
I love making projects and then changing them so that they are just that bit different from the original. I think that may be one of the reasons I like making videos; it kind of makes me do that anyway.
This time it was a fairly easy alternative. All I did was turn the Designer Series Paper over, and there was the basis for the alternative card. I had intended to use the hint of glimmer paper on the original, but it just wasn't going to work, but it does add a 'pop' to the second version.
Both cards were really straight forward to make, and did not take many supplies, other than a selection of punches. But you could make the card with squares of card cut on your trimmer, and it would still work well. I hope you give it a go.
If you need any of the supplies, they are listed below, so you can just click on the image and jump straight over to my Online Shop. Remember, if you spend more than £25 and use the current Hostess Code, you automatically become a VIP Member, with all the goodness that goes with that. If your order is over £45 (or a multiple of £45) you get to chose a FREE item from the Sale-a-Bration Catalogue. If you have a really big order, over £100, then please look at the Starter Kit, it really is the best value, particularly during Sale-a-Bration, as you get to pick two FREE stamp sets (any from the Annual or Spring/Summer Catalogues, all for £99 including Postage, with no obligation to do anything other than make the most of the Demonstrator discount until the end of June - go on, you know you want to!
Well that was nearly very interesting. As those of you who have been following me for a while may know, I film my videos and write my posts in batches as I find that really works for me. I then schedule them to post either on YouTube or on my website at the same time. I have done three videos in this batch, and thought I had uploaded them and attached them to the correct post. Well not quite, so you nearly got the wrong ones paired up, which might have been interesting.
Anyway, today's is a card using the Window Whopping stamp set, with a hint of Dragonfly Dreams on the original card, but otherwise, just the one stamp set. one ink pad, and for the card I videoed, only Whisper White and Wisteria Wonder Cardstock, really monotone, with just a pop of pink in the ribbon.
I love challenging myself to use a very few supplies occasionally. It is so easy to play with everything, but I think it is important to remember that not everyone has lots of product to play with, and I see it as part of my job to produce projects for those people too. Having said that, Sale-a-Bration is a perfect time to buy some extra bits and pieces because you can also get some free stuff; one free item from the Sale-a-Bration catalogue for each £45 you spend, and there are some new lines about to be added, including a couple of new stamp sets and, my personal favourite, some coloured glimmer papers!!! Watch this space for some projects using that.
Oh, and did you notice I managed to avoid doing a Valentine's project today! Now what to do with all that left over 'Sending Love' Paper. Hmmm, I think I will have to have a think about that and see what I can come up with. Watch this space for the results of that challenge. Give me a day or two to think...
I hope you enjoy this project. If you need any supplies, they are listed below and you can just click on the image to go over to my online shop. If you spend £25 and use the hostess code, you will automatically become a VIP Member and get all the wonderful extras that come with that, I have already mentioned the Sale-a-Bration deal for FREE products, but remember that if you are thinking of becoming a member of the Stampin' Up! family, now is the moment to dip your toe in the water, as you will get to choose two full price stamp sets to add to your starter kit, for FREE, so £130 of product PLUS two free stamp sets, all for £99 including P&P. WOW!!
Dimensions:
Card base - A5 folded in half to make an A6 base
Mat of coloured cardstock 5-5/8 x 3-7/8" (14.25 x 9.75 cm)
Mat of Whisper White 5-1/2 x 3-3/4" (14 x 9.5 cm)
Scrap of cardstock approx 3 x 3" (7.5 x 7.5 cm) for die cutting
I do love a Monday morning, and I know there are not many people who can say that! Being my own boss helps, but the main reason I love Mondays is that it is time for another Global Design Challenge, and for me that means challenging myself to getting my submission designed and posted within 2 hours of knowing what the challenge will be; I may just make it this week.
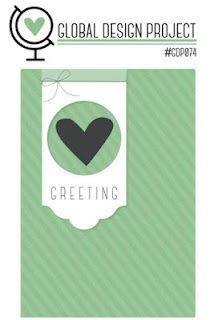
This week we have a Sketch Challenge, so other than taking a very basic design and making it our own, there really are very few limitations, which in a way is a bit harder as you have ALL of your supplies to work with. The sketch for this week is this one:
I have taken this quite literally this week, even down to using the same shape of label at the top of the card. There is a bit of a trick to this as the die is much shorter than I have cut it, so I had to place my top cutting plate so it did not cut the whole design, which then meant I could extend this element to be as long as I wanted. I used the next size up to cut some of the beautiful Red Glimmer Paper. In fact, this whole project has ended up as an example of how wonderfully Stampin' Up! colours match across the product range. I have used Real Red, as a bit of a nod to Valentine's Day, in the Card Mat, the Ink, the Designer Series Paper, the ribbon and the Enamel Shapes.
I also used the Real Red Watercolour Pencil for the Ladybirds, I had originally used the Stampin Marker, but felt that made the image look a little flat, but I am really pleased with the softer image you get with these fabulous pencils, just use a Blender Pen to get the watercolour look.
I hope you enjoy this card, it really took no time to put together, in fact I think it took longer to take the photos!!
As I filmed the video for this post, there were a few snow flakes falling in Oxfordshire, not many, but a few. So anything that uses Sunshine Sayings Stamps and Sunshine Wishes Dies has to be a winner in my book.
I love doing watercolour backgrounds, but keep forgetting that they are so easy to do and so effective; I just have so many other things to play with, I forget the simple things can be just as effective, if not more so. And this card really is simple. A few strokes of colour, one stamp set, two inks and some die cuts, oh and a few sequins for even more sparkle.
I hope you enjoyed this project. Remember that Sale-a-Bration continues until the end of March, so now is the perfect time to stock up and get a FREE item with every £45 you spend. Remember to look at the amazing Joining deal too, with the added value in Starter Kits during Sale-a-Bration, there really isn't a better time to become a member of this fantastic family.
Dimensions:
Base - A5 folded in half to make an A6 Base
Colour Mat and Whisper White for the inside of the card - 5-5/8 x 3-7/8" (14.25 x 9.75 cm)
Shimmer Card for wash and stamping - 5-1/2 x 3-3/4" (14 x 9.5 cm)
Well enough from me, it is Sunday after all, so I am sure you have lots you want to get done. Have a peaceful day and I look forward to your next visit.
I totally get that I am in the lucky position to be able to make handmade items pretty much whenever I want, as it is my job. But everyone can get involved in sending happy thoughts to people, and there shouldn't need to be a Special Reason. So, when I was at the Stampin' Up! Convention last year, I was thrilled that one of the free stamp sets we were all give was 'Special Reason' #142902, because it has one of the sentiments is 'There's no special reason for this card...' Just perfect!
This is a great set also because if has some really pretty flowers and leaves that can be layered up, and they work particularly well with the Stylish Stems Framelits, which is how I have used them in today's project (and you can buy them together as a Bundle, so with 10% off - we love a bargain!). I got the inspiration for this card from the fabulous Dena Rekow over at The Creativity Cave in the USA. My card is quite different from her's but her's was the jumping off point.
That is another thing I love about the Stampin' Up! family, are all really happy to share our ideas with everyone. In a couple of weeks I will be at a Team event where we are encouraged to share our ideas by swapping projects with each other. These are always fabulous events, but I am not sure we have quite worked out that we are adults!!
If you want to buy any of the products I have used, please pop over to my on-line store, and remember that if your order is over £25 you will automatically become a VIP, and get some freebies AND if you remember to use the current Hostess Code, you will get additional Goodies. If your order is over £150, please do not use the hostess code, as you will get your own Hostess rewards (during Sale-a-Bration you can get even more Stampin Rewards - see below).
Sale-a-Bration continues until 31 March, so remember the additional offers that Stampin' Up! have for either free product (for every £45 excluding P&P), or additional free product if you are looking to become a member of the Stampin' Up! family and join in with all our fun - I would love it if you would like to join my Team, we have a blast and occasionally remember to act like adults!!
Dimension:
Base - A5 folded in half to make an A6 Cardbase
Colour Mat and Whisper White for inside the card - 5-5/8 x 3-7/8" (14.25 x 9.75 cm)
Whisper White for die cutting and stamping - 5-1/2 x 3-3/4" (14 x 9.5 cm)
I have had a few questions about the Stampin' Up! Starter Kit and what sort of things you could put in it that would work together and be a good base for both someone who just wants to make the most of the fantastic offer, but also for someone who might want to run some classes or host a couple of events with their friends.
These questions coincided with the arrival of my latest box from Stampin' Up! (I will never get over the excitement of a delivery and ripping the box open), so it was a perfect time for me to show shiny new product straight from the box. As during Sale-a-Bration you also get to pick two free stamp sets from either the Annual or Spring/Summer Catalogue, it makes the kit even bigger than usual. So what did I include, and why?
In the video I put together I started with the basics of inks and cardstock, so will do the same here:
Inks etc.
In Colour 2016-18 Classic Ink Pads - this set will get you a good range of colours, and as it is a 'set' you get it at a discount
Memento Tuxedo Black - this works well with all stamps and with the blender pen
Blender Pens - you get three in the box
Watercolour Pencils - these are new to Stampin' Up! and are very popular. They can either be used on their own, or with the Blender Pen to give you more of a watercolour effect.
Cardstock and Designer Series Papers
Whisper White A4 Smooth Cardstock (40 sheets) - this is perfect for stamping on
Whisper White A4 Thick Cardstock (24 sheets) - brilliant for card bases
Succulent Garden Cardstock Pack (24 sheets, 8 each of Mint Macaron, Old Olive and Tip Top Taupe) - these are some good soft colours that will work well with the watercolour pencils
Fruit Stand Cardstock Pack (24 sheets, 8 each of Pear Pizzazz, Peekaboo Peach and Watermelon Wonder) - again some good colours to work with the inks and the watercolour pencils, but with a bit more of a 'pop'
Basic Black A4 Cardstock (24 sheets) - this is a good stable and a foil for some of both the soft tones and the brighter ones I have included in the kit
Falling in Love 12 x 12 Cardstock (24 sheets, 8 each of Soft Sky, Sahara Sand and Blushing Bride) - 12 x 12 can be used for cards, larger boxes and scrapbooking, so good to have a few sheets of this larger size on hand
Falling in Love Designer Series Paper (12 sheets, 2 each of 6 double sided designs) - so pretty, and perfect with the stamp sets I have included
Whisper White C6 Envelopes (40 in a pack) - you need something to put your cards in!!
Ribbon
Succulent Gardens Ribbon Duo Pack (2 rolls: 4.6m each of Whisper White and Sweet Sugarplum) - this ribbon is so soft and luxurious and the colours work with the inks and the Designer Series Paper I have included.
Embellishments - choice of
Basic Rhinestones - everything is better with a bit of 'bling'
Basic Pearls - will work really well with the Falling in Love Designer Series Paper
Dazzling Details in Gold AND Silver (both colours can be included)
FREE Stamp Sets - both of these are available for use on Clear Blocks, or you can order it with Wood Blocks included if you don't already have blocks
Beautiful You
Papillion Potpourri
I chose these sets simply because I think they are beautiful and, if you wanted to run classes (not that you would have to do so) there are lots of images, so this would mean you can have more than one person using the set at a time. But you should choose the sets that are right for you and what you are planning to do.
So there you are, that is a basic set for pretty much anyone. I would certainly say that if you want coloured cardstock (and who wouldn't?), look at mixed colour sets, so either those that are made to go with a particular set of paper, or the Colour Collections (which give you 2 sheets of each of 10 colours).
I hope you have found this interesting, or useful, or both. If you are interested in giving this a go, then please click the link here:
One of the many things I enjoy about what I do, is being able to take something really quite ordinary and package it in a really special way, turning the mundane into a really lovely gift for someone. I think this really embraces the old saying that 'it is the thought, not the gift that matters'.
Now I LOVE, L'Occitane soaps, and pretty much everything else they do, and I would never suggest that a gift of one of their soaps is mundane or ordinary, but I think you get where I am going with this.
I like the original version I made, using Blooms and Bliss Designer Series Papers, but I actually think I prefer the By The Shore version; I think it has cleaner lines and is just that bit more elegant. What do you think? Which do you prefer?
Remember that if you place an order through my online shop, you will get a little thank you from me, and that if your order is over £25 and under £150, you should also use the current Hostess code so you get a share in the Hostess Rewards for the month. These will be sent out by me in the middle of the following month.
Any order over £25 (excluding P&P) also qualifies you as a member of the VIP Rewards Club. Just remember not to select 'No Contact' when you place your order.
If your order is over £150, don't use the Hostess Code, as you will win your own rewards, and until the end of March 2017, you get even more Hostess Rewards than usual. If your order is over £200, you will get an ADDITIONAL £20 in rewards!! AND Sale-a-Bration items. Go on, you know you need stuff!!
Dimensions -
8-1/2 x 6" (23 x 15 cm - the bag will be a little large in metric)
Score Long edge at 3, 4, 7 and 8" (7.5, 10.5, 18.5, 21.5 cm)
Score Short Edge at 1" (3cm)
Turn paper over and with the Long edge at the top (with the scored edge at the bottom), score at 1/2 and 4-1/2" (3 and 14 cm) BUT only down about 2" (5 cm)